

Ordering an existing image through the SkyFi platform is a fast way to access satellite imagery without waiting for a new tasking. If you need archived data from a specific location and date, the option to order an existing image can meet that need without the extra time or cost of capturing a new one. In this tutorial, we will walk through each step, from checking availability to selecting your image and placing the order. This method is useful for users who need historical data for analysis, monitoring, or reference. It is important to review details like resolution, capture date, and cloud cover to select an image that fits your use case. The process is simple and direct. By the end of this guide, you will know how to order an existing image using the SkyFi platform and what to expect at each step.
1. Start from the Homepage
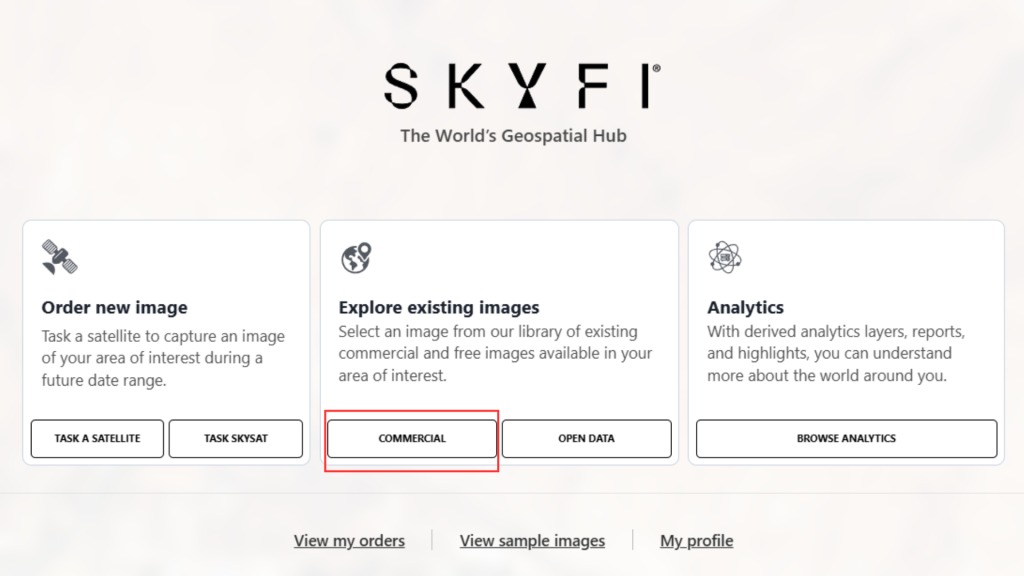
Click “Commercial Image” on the homepage.
2. Search for Area of Interest
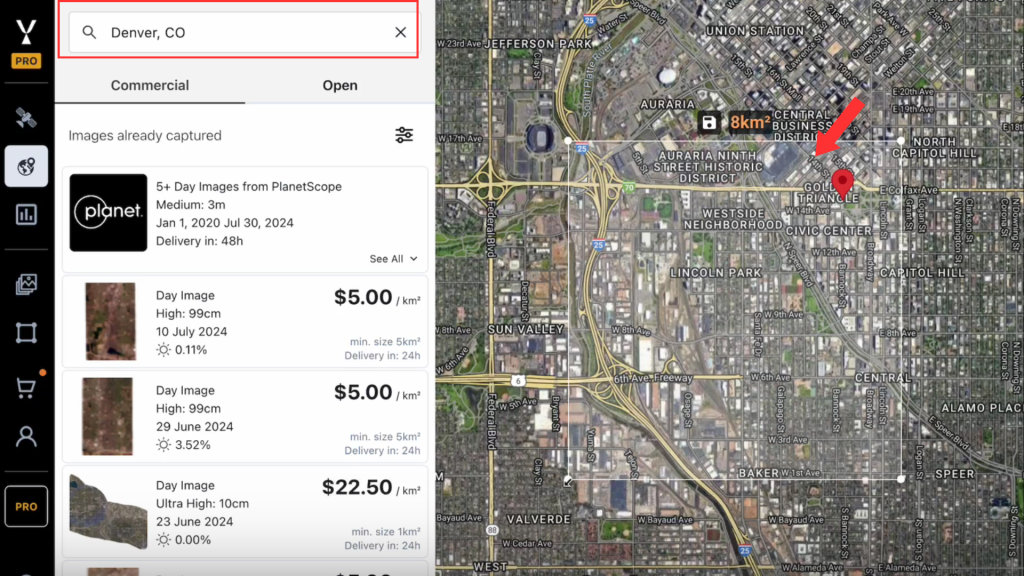
- The platform will load a base map.
- Use the search bar to locate your area of interest.
- An AOI (Area of Interest) box will appear.
- You can expand, drag, and reposition the box as needed.
3. Adjust View for Better Context
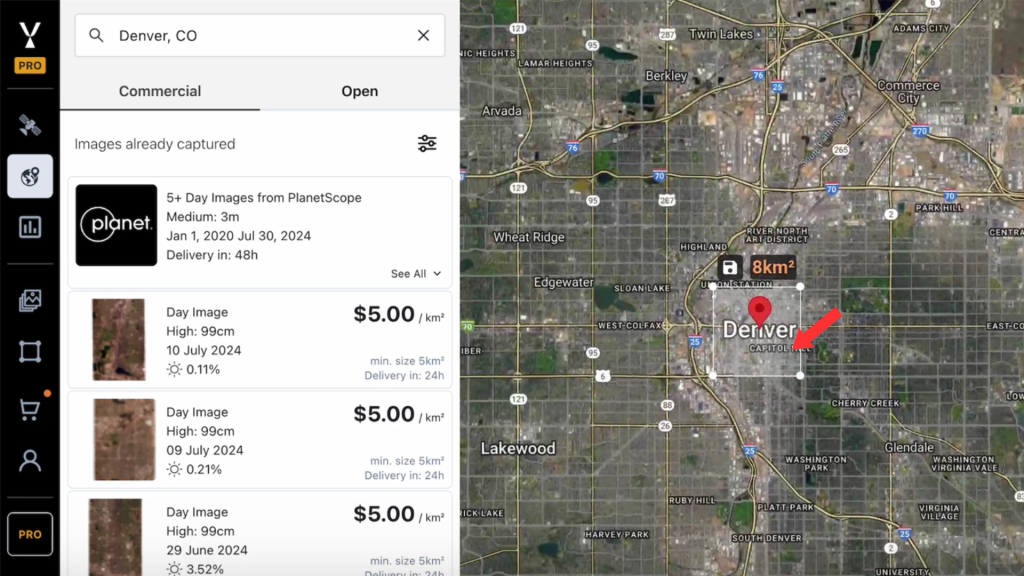
It is recommended to zoom out slightly to better understand the coverage of available images in the area.
4. View and Select Available Images
- Existing image options will populate automatically.
- Click on an image to:
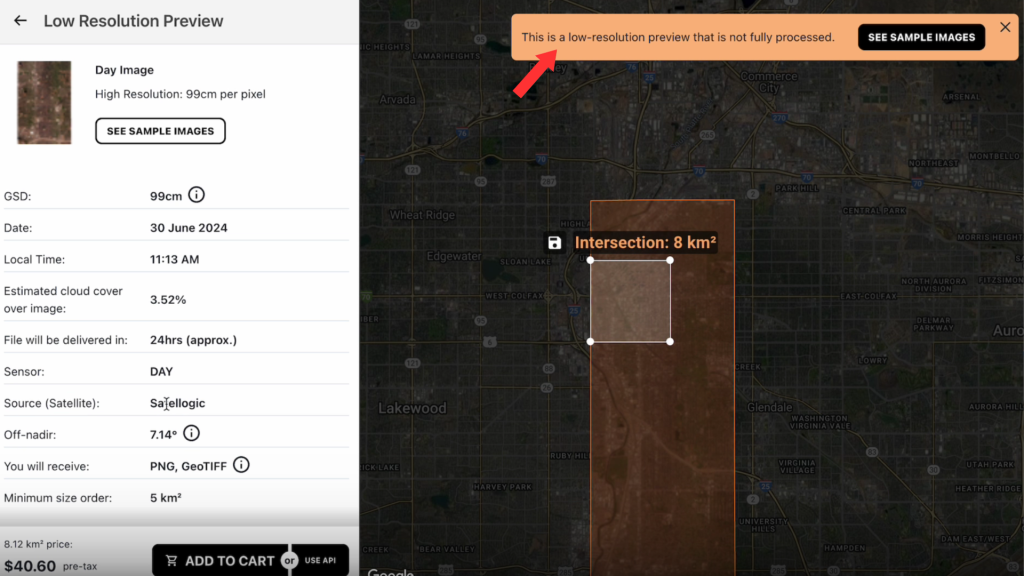
- View a low-resolution preview.
- Check for cloud coverage in the area.
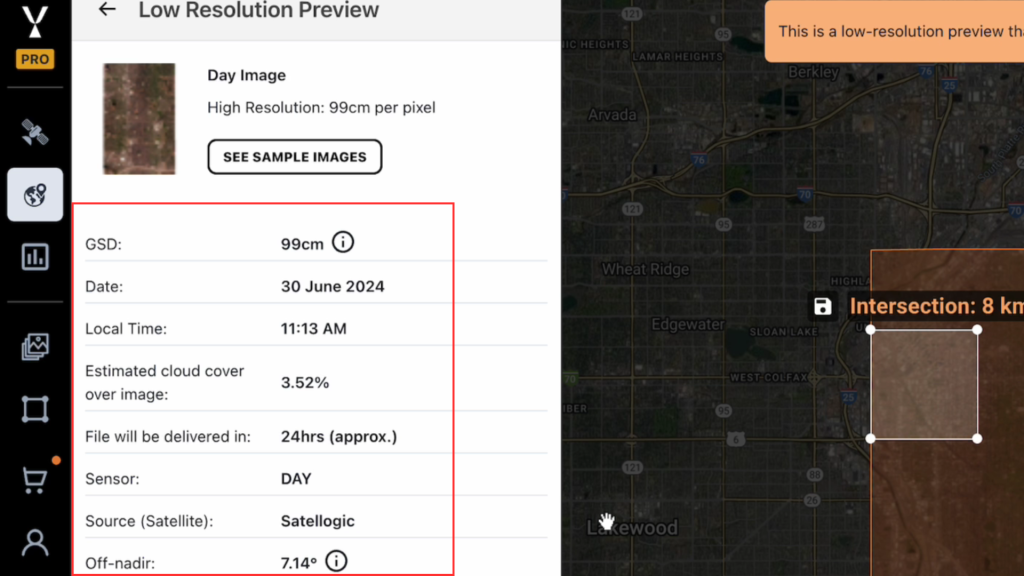
5. Review Image Details
- Use the information panel to check the following:
- Resolution
- Date and time of capture
- Estimated cloud cover
- Provider
- Off-Nadir angle
- Other related metadata
6. Complete the Order
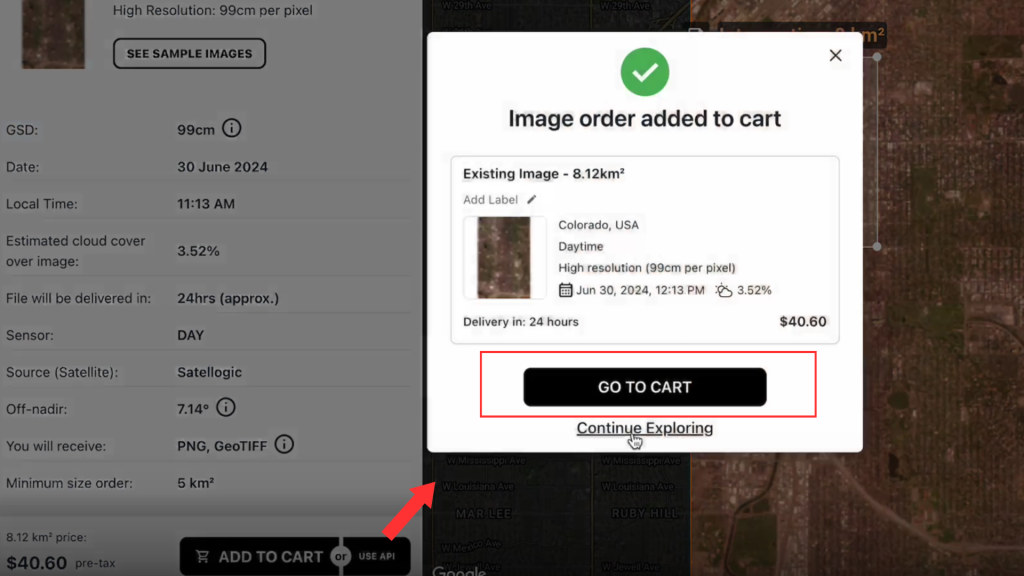
- After confirming image quality and relevance, click “Add to Cart.”
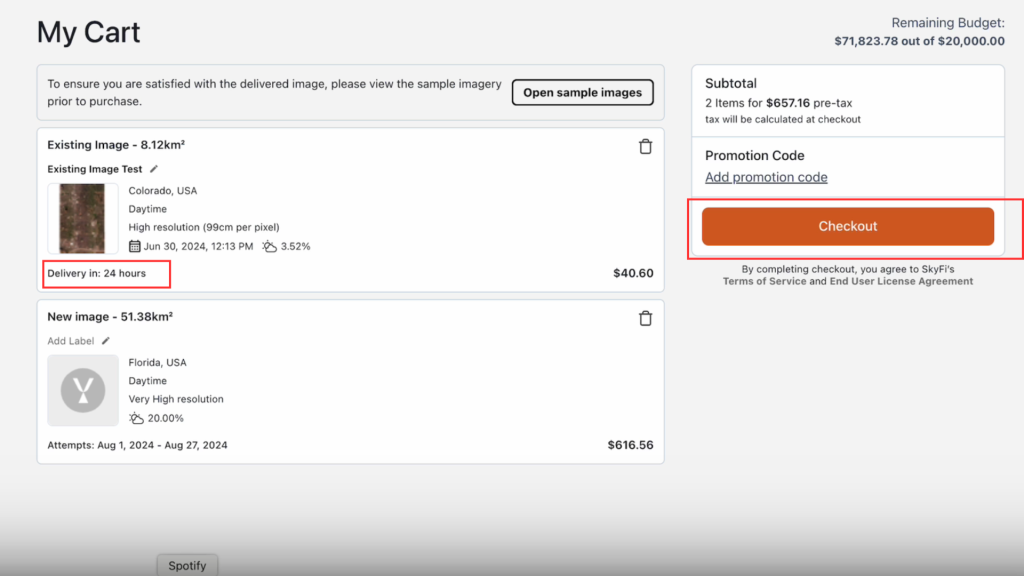
- Go to your Cart and click “Checkout.”
- Save the file upon delivery.
The image will be delivered within the time specified during checkout.
Ready to get the imagery you need without waiting? Sign in to your SkyFi account and order an existing image today. It only takes a few minutes to start.