This tutorial explains how to order analytics on the SkyFi platform. It will guide you through the steps needed to select the right data, place an order, and review the results. Using order analytics can support business operations by helping you observe patterns and trends in specific locations over time. The SkyFi platform provides access to satellite data that can be used to track activity related to infrastructure, agriculture, supply chains, and more. Whether you are monitoring a single site or comparing multiple areas, this guide will help you complete an order for analytics efficiently and with clarity.
1. Access the Analytics Library
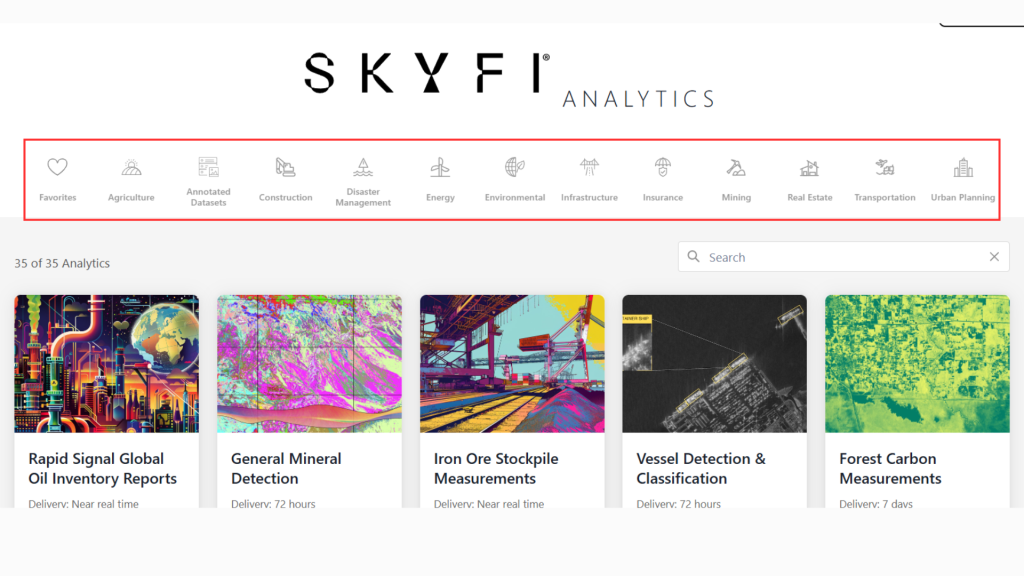
- From the homepage, click “Browse Analytics.”
- A library of over 40 analytics products will be displayed.

2. Filter or Browse Analytics
- You can:
- Click on a specific industry to view analytics related to that industry.
- Or clear the filter to browse the full analytics library.
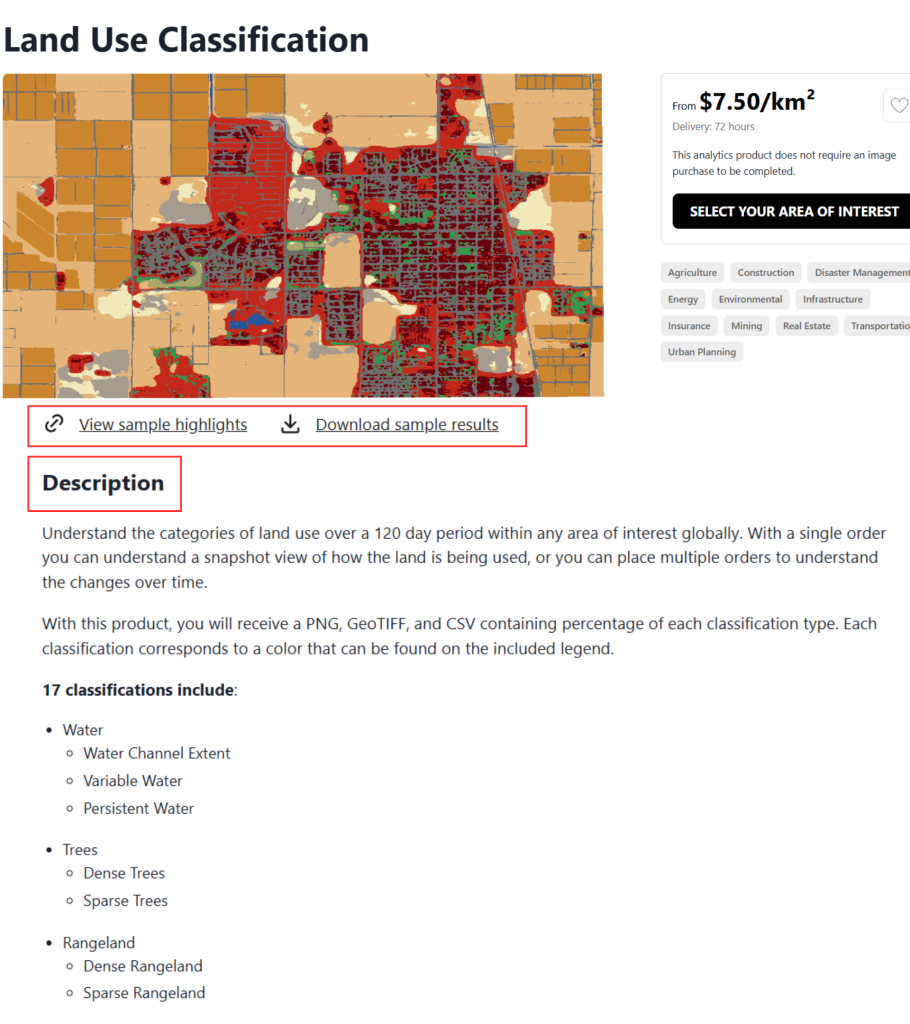
3. View Analytic Details
- Click on an analytic to open its product page.
- You will be able to:
- Read the description of the analytic.
- View additional product details.
- Download sample results.
- View sample highlights that can be interacted with directly on the SkyFi platform.
4. Review Visual Elements
- Click View Sample highlights to view
- A legend.
- A vector file overlaid on imagery.
- A sample report, if available.

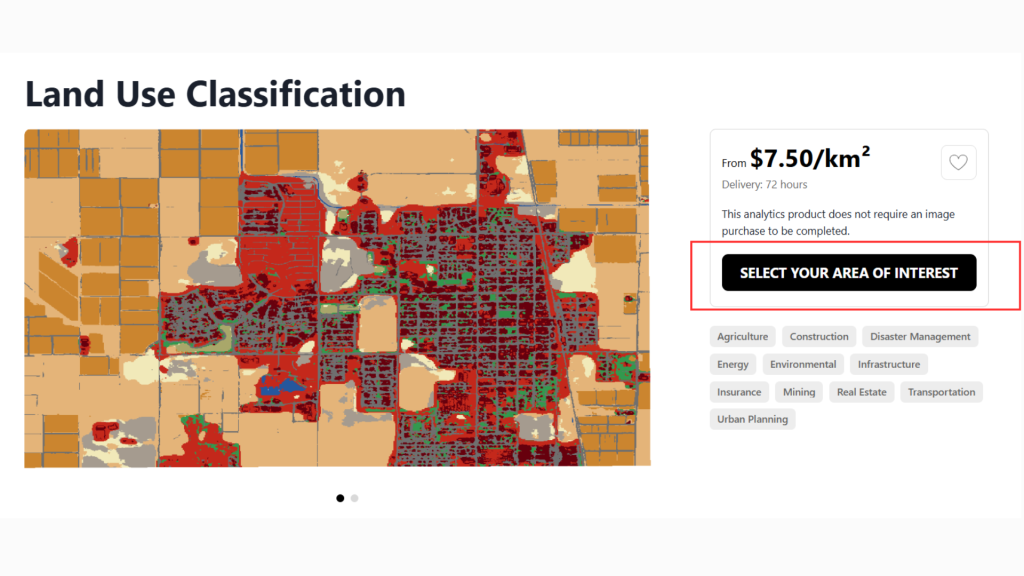
5. Select Area of Interest
- To order an analytic, click “Select Your Area of Interest.”
- This will open the standard SkyFi interface.
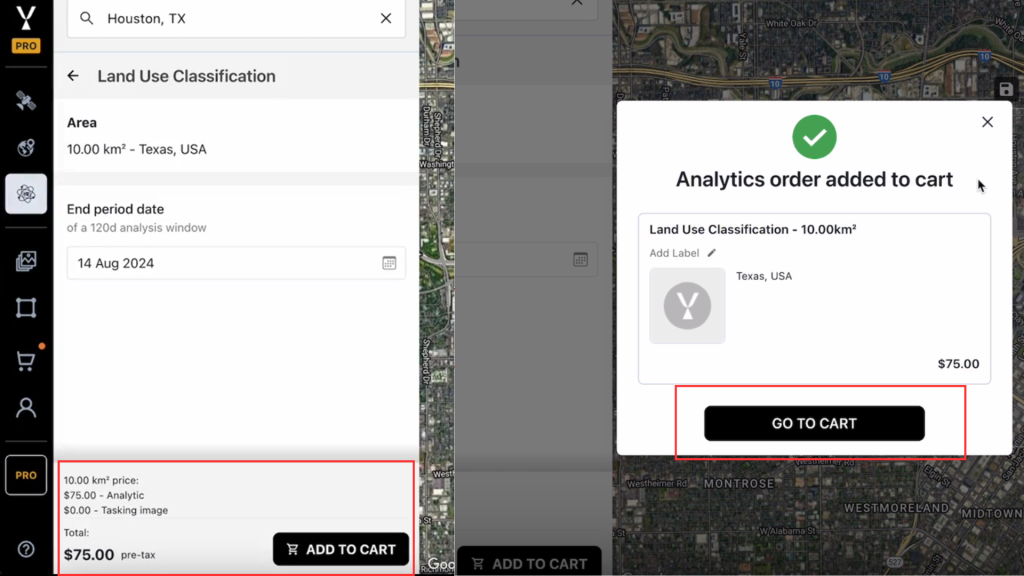
6. Define AOI and Adjust Parameters
- Use the search bar to find your area of interest.
- Adjust the parameters on the left panel according to the specific analytic.

7. Review Pricing and Order
- At the bottom of the page, review:
- Cost of the analytic
- Cost of the required imagery
- Click “Add to Cart”, then proceed to Checkout.
8. Delivery
- The analytic will be delivered to your inbox once both the imagery and analysis are processed.
You now have the steps to order analytics on the SkyFi platform. Try it now!