Renaming an order on the SkyFi platform is a simple and direct process. If you’re managing multiple projects or working with several team members, being able to rename an order helps keep things clear and organized. A well-named order makes it easier to track progress, match data to specific projects, and avoid confusion down the line.
This tutorial will show you how to rename an order in a few quick steps using the SkyFi interface. The platform is designed to support a smooth and efficient workflow, so the process doesn’t require any technical background or complicated actions. You’ll be able to make the change right from your dashboard without needing extra support.
Whether you’re updating an order name to reflect a project title, client label, or geographic location, the process is straightforward. If clarity and order management are important to your work, learning how to rename an order is a useful step. Keep reading to get started and see how easy it is to make this small but important update.
1. Accessing Your Orders
- From the homepage, click on “My Orders.”
- This will display a list of all current and past orders.

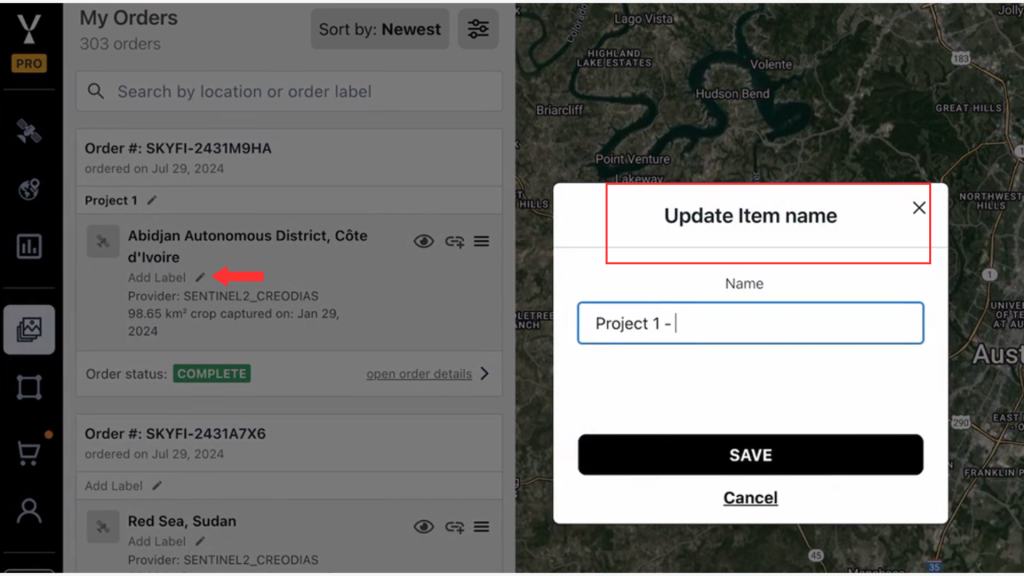
2. Renaming the Order or an Item
- Locate the order you want to rename.
- You can:
- Rename the full order.

- Rename individual items within the order.
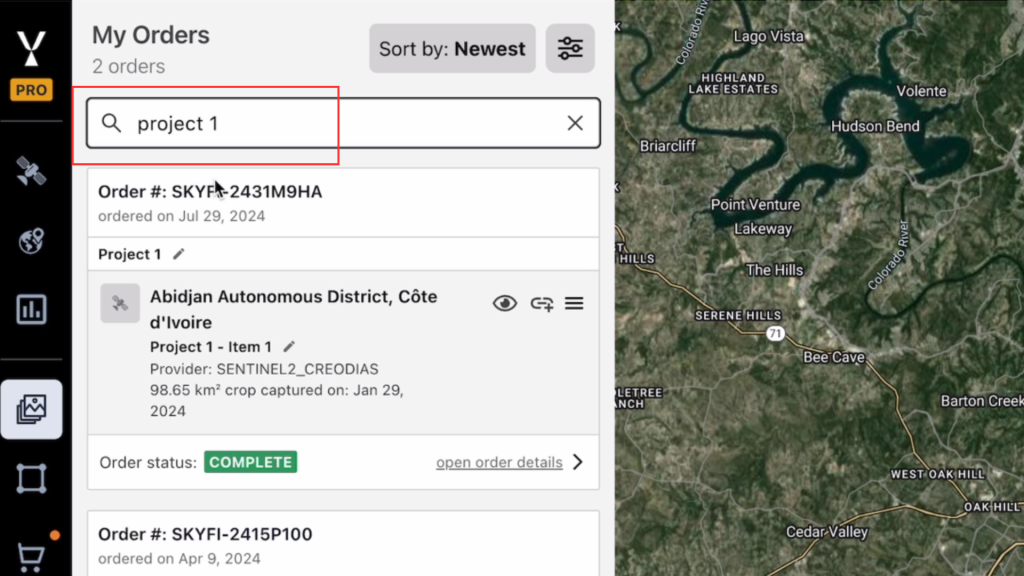
3. Using the Search Bar
- Use the search bar to find your renamed content:
- Search by the custom project name applied to the full order.
- Or search by individual item name (e.g., “Item 1”) if renamed at the item level.
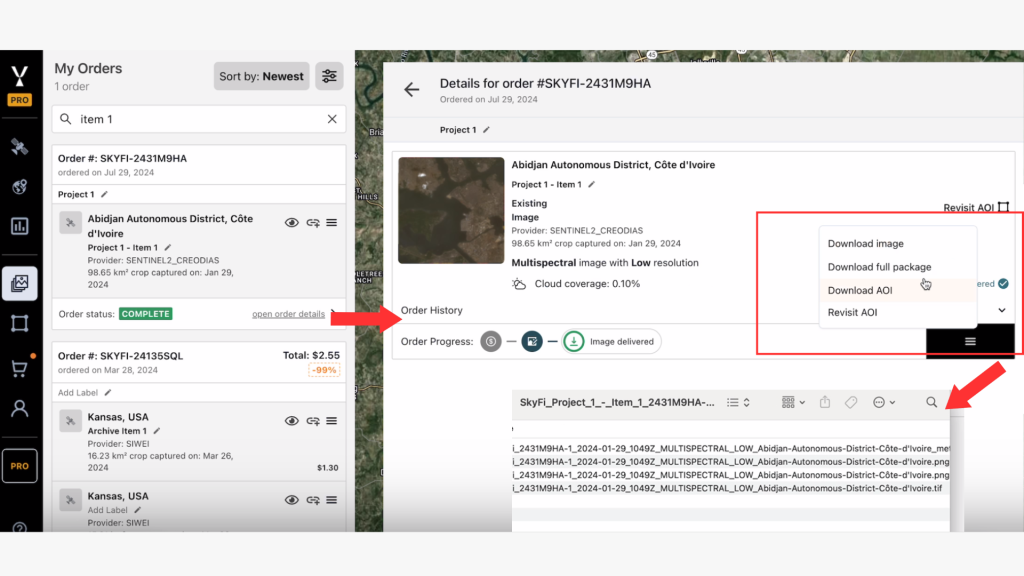
4. Downloading with the Renamed Title
- When you download the full package through the app, the downloaded file will include the renamed project or item name in the filename.
- This naming convention is useful for identifying files.
Note: This naming feature is only available when downloads are performed within the app.
Renaming an order is quick and keeps your workflow clear. Visit SkyFi now to manage your orders with ease.