

When working with satellite imagery, it’s important to select a provider that matches your specific needs. On the SkyFi platform, users have access to multiple providers offering different types of imagery with varying resolution, coverage, pricing, and delivery times. Choosing the right one depends on what you’re looking to achieve, whether it’s monitoring a location over time, analyzing terrain, or sourcing recent data for a project.
This tutorial will walk you through how to select a provider on the SkyFi platform. You’ll see how to compare providers side by side, understand what each offers, and decide which option aligns best with your requirements. While some providers offer faster delivery, others may offer broader coverage or lower pricing. The goal is to help you make a clear, informed decision based on the filters and tools available directly within the SkyFi interface.
By the end of this tutorial, you’ll know how to use the platform’s features to review available options and select a provider that fits your task. This is especially useful if you’re working under a deadline or budget and need to quickly assess what’s available. The steps covered here apply to both archived and tasking imagery workflows.
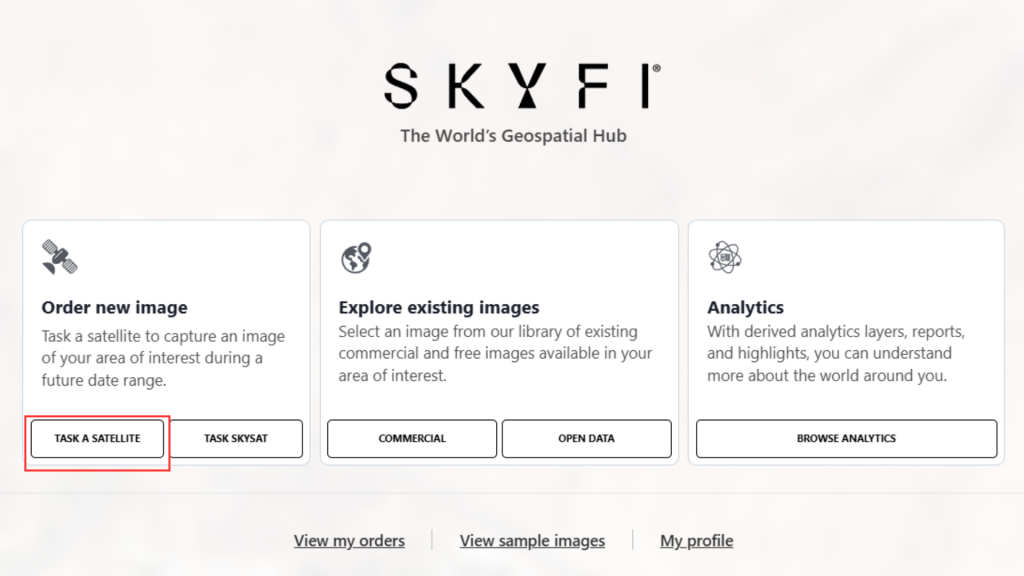
1. Start a New Task
Click on “Task a Satellite” from the main menu.
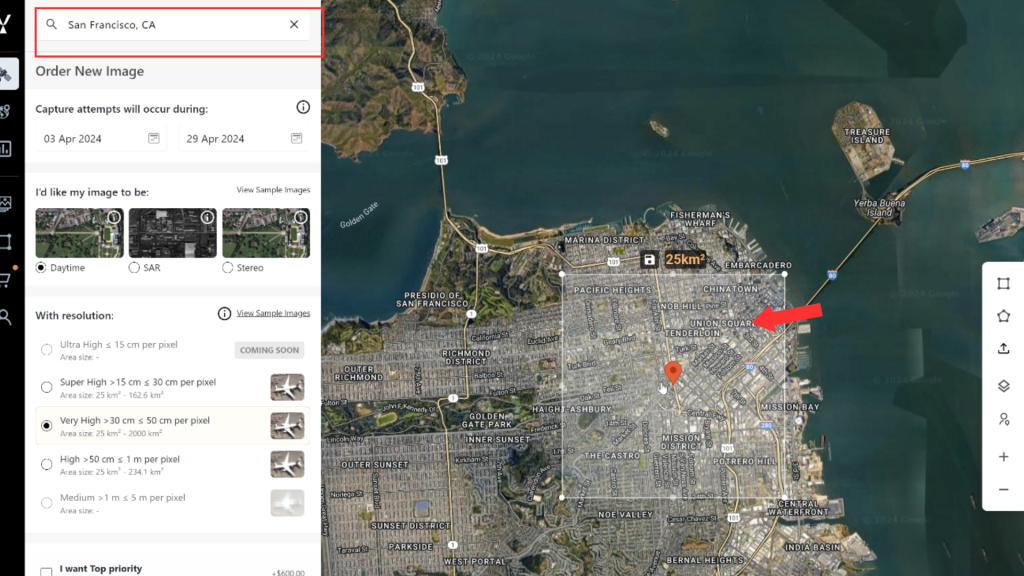
2. Define the Area of Interest
- Use the search bar to locate your desired location.
- A selection box will appear on the map.
- Drag and resize the box as needed to define your capture area.
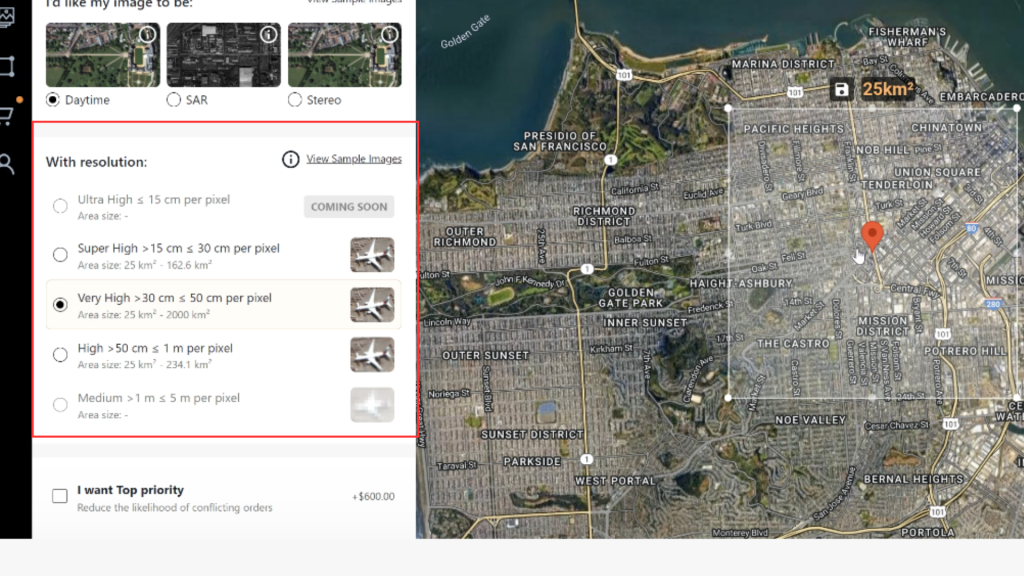
3. Set Resolution
Choose the desired resolution from the available options.
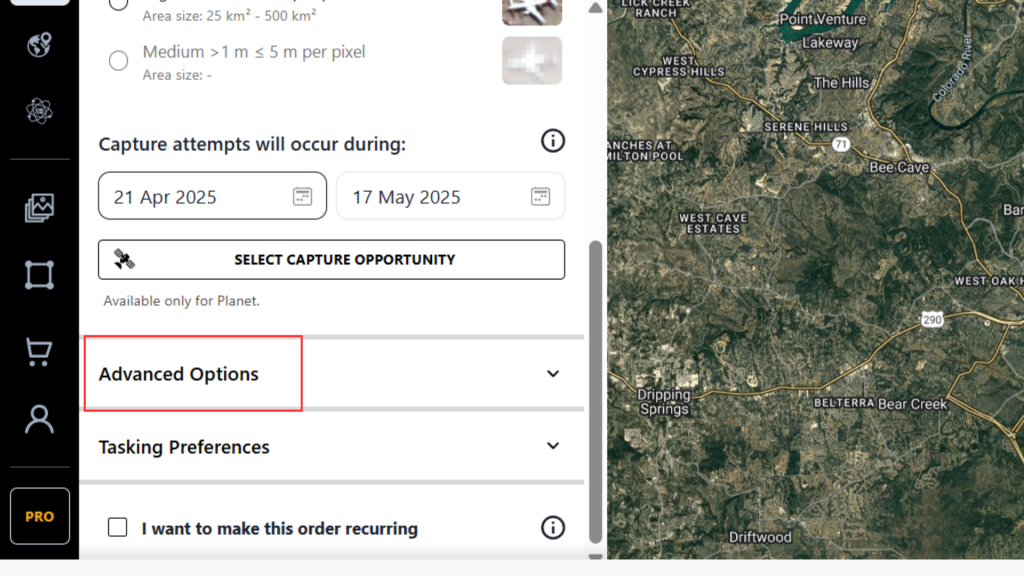
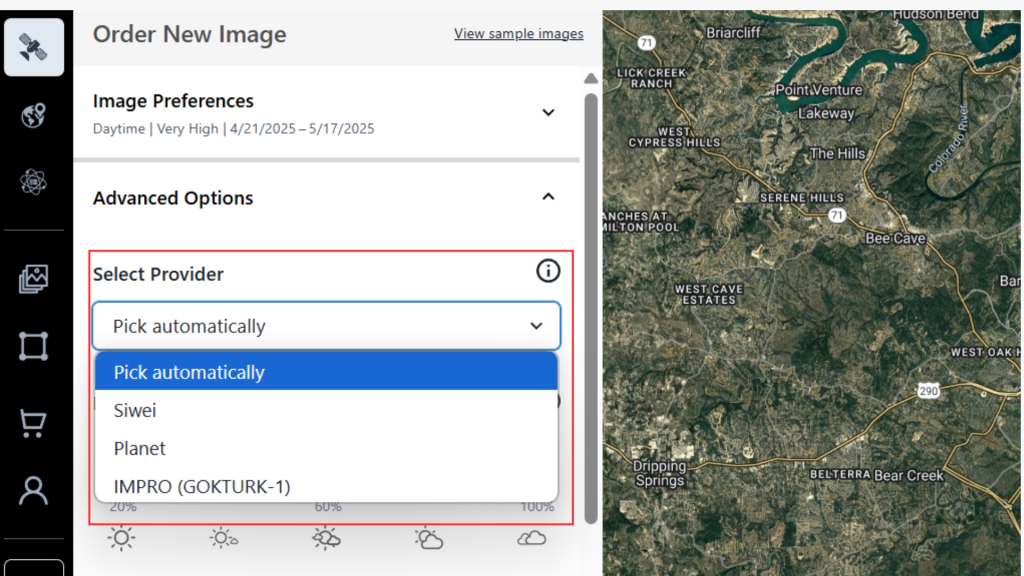
4. Open Advanced Options
Scroll down and click on “Advanced Options.”
5. Select Provider
Under the “Provider” section, select one of the available provider options.
6. Complete the Order
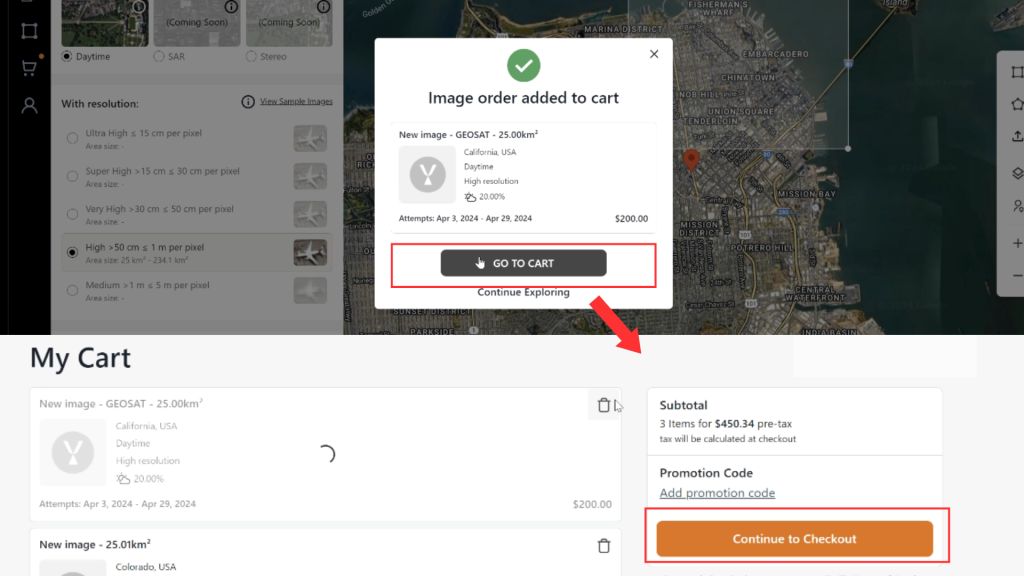
- Click “Add to Cart.”
- Go to your Cart.
- Click “Checkout” to submit your order.
Ready to get started? Visit SkyFi now to compare options and select a provider that fits your needs.